
If you don't want your team members to log in to Neeto products explicitly, then you can use the Single Sign-on (SSO) feature. Using this feature, your team members will log in to your product, and then, with a single click, they will be inside the Neeto product. They don't need to log in to Neeto explicitly.
For example, let's say that Mercy Hospital, based in Boston, is using NeetoCal. That hospital already has login credentials for its doctors. Now, those doctors do not need to log in to NeetoCal. The doctors log in to the Mercy hospital system, and they have a link to log in to NeetoCal. The doctors click that link, and they are logged into NeetoCal, where they can manage their availabilities.
In this case, we used the example of NeetoCal, but all Neeto products support SSO. If you need SSO support, please get in touch with us using "chat with support".
Architecture
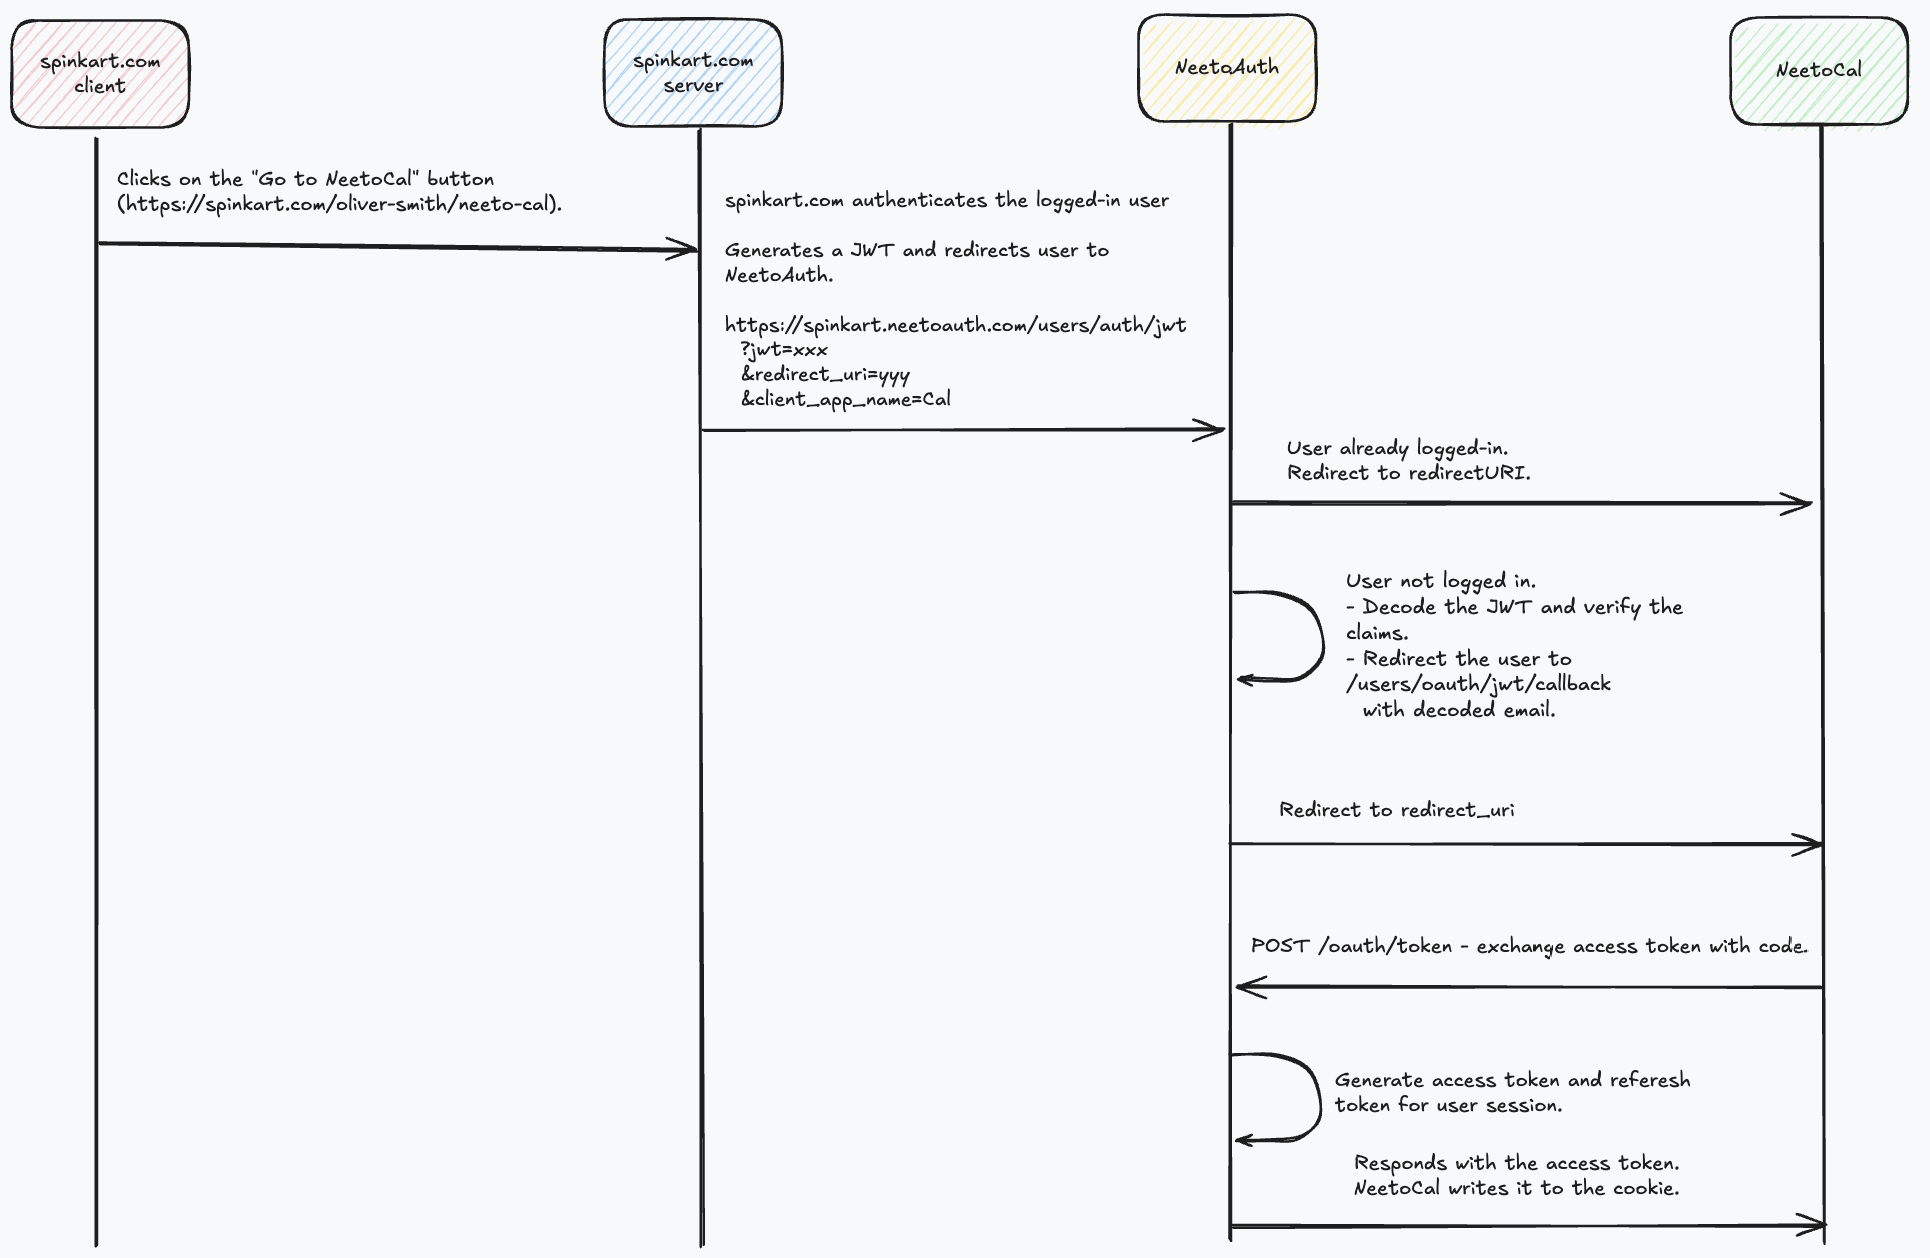
The user clicks on a button "Go to NeetoCal", which should be a route in the client's server. Let's assume that the button link was
/oliver-smith/neeto-cal.The server verifies that the current user is logged in. Perform any other authorization steps here.
The server generates the login URL using the neeto-jwt client. Redirect the request to this login URL. The client will also ask you to pass the redirect URL. The redirect URL should be the URL to which the user should be redirected to after a successful authentication. Let this be a NeetoCal URL.
If the user was previously logged into this workspace, the user will be directly redirected to NeetoCal.
Else, NeetoAuth decodes the JWT, and verifies that all the claims are valid. On an unsuccessful verification, the user will be taken back to the Neeto login screen.
On a successful verification, the request will be redirected to a callback URL, which performs the authentication.
Once authenticated, the request will be redirected to NeetoCal.
Internally, the doorkeeper will exchange the access tokens with NeetoCal.
Getting started
Create a Neeto workspace.
Now invite all your team members with the same email address with which they have an account in your product. You can do that either manually inviting all the folks or by using our API.
neeto-jwt client
neeto-jwt is a public monorepo, which contains neeto-jwt clients in different programming languages. If you need further changes to the client, feel free to reach out to us at [email protected]. Your direct contributions to the repository will also be considered.
Integrating a Node.js project
Once your request for enabling JWT login is approved, we will share a private key with you. It is crucial that you do not share the private key with anyone.
Similar to the above architecture, you should create a separate route to handle requests to Neeto. The route should verify that only authorized users can perform a login to Neeto.
Follow the steps mentioned in the neeto-jwt JS client to generate the login URL. The redirect URL should be the URL to which the user should be redirected to after a successful authentication.
Redirect the user to the login URL.
A login URL will be one-time use. You should generate a new login URL each time the user visits the route.
Please refer to the Neeto JWT integration PR if you need an example to work on.